

How To Install Baseboard Heater Thermostat
Dan has been a homeowner for some 40 years and has nearly always done his own repair and improvement tasks. He is a licensed electrician.
Learn how to install your own line voltage baseboard heater thermostat. This is an installation most homeowners can do themselves.
Baseboard Heater or Line Voltage Thermostats
Most home heat and cooling thermostats are of the low voltage variety, but baseboard heaters and many other totally electric heaters use a line-voltage thermostat. That is, the same voltage that operates the heater (or occasionally the air conditioner) is used in the thermostat.
Common applications include wall heaters, ceiling heat (heating wires buried in the ceiling), and baseboard heat. Most such heaters operate on 240 volts, but some operate on the more normal 120 volts found in household outlets.
Some baseboard heaters utilize a built-in thermostat. This article is not directed towards these thermostats; we'll look at the more common wall mount style of thermostats. If your unit is of the built-in style, it is still possible to easily replace it, but a thermostat very similar to what is already in the baseboard heater will have to be utilized as space limitations and physical mounting becomes much more important. The actual wiring is very similar to that found in a wall mount thermostat, however, and is explained later in this article.
Mechanical Baseboard Heater Thermostats
The cheapest of the line voltage units, these thermostats operate on mechanical principles rather than digitally. They are not as accurate in maintaining a set temperature, usually allowing a variation of 2 to 3 degrees each way from the temperature setting they have been set at. None are programmable.
Nevertheless the mechanical thermostat can be a very viable option for many homeowners; the new unit being installed in the instructions below is of this type. It is being installed in a remodeled room that does not see a great deal of use; the temperature is normally set at 55º unless the room is to be used. In such a case the more advanced digital and especially programmable line voltage thermostats are of little value, simply adding cost for no actual return.
Similarly to their more advanced brothers, mechanical line voltage thermostats are available as either a single pole or double pole configuration. A double pole is preferable, but before purchasing one, the old thermostat must be checked. While it is possible to replace a single pole thermostat with a double pole, the wall box must have the needed wiring already available. Four wires, usually in two separate cables, must be present in the wall box. Double pole units should always be replaced with another double pole thermostat.
Many simple mechanical baseboard heater units include a thermometer in the thermostat and indicate the temperature being set on the dial. Others may or may not have the thermometer (not particularly accurate, but at least an indication of what temperature the room is at) and may have only an indication of which way to turn the dial for a higher temperature setting. Most people prefer to have the desired temperature setting stamped on the dial instead of arbitrary letters or nothing but an arrow indicating higher temperature settings.
Digital Baseboard Heater Thermostats
These are a little more expensive that the cheaper mechanical style, but will normally maintain the temperature of the room closer to the set number. Common variances allowed is plus or minus 1 degree instead of plus or minus 2 or 3 degrees. Realize that plus or minus 3 degrees can result in a swing of 6 degrees in the temperature of the room; this is unacceptable to many people and a digital thermostat should be used instead.
Some require batteries to operate; if you are not prepared to have batteries on hand, make sure that the thermostat chosen is not of this type.
They will usually have a display, although the size of that display can vary widely. A thermostat with a display and lighting of that display should be chosen that is usable by the owner. If you wear glasses a small display may be contra-indicated as it might be unreadable with glasses.
Digital thermostats are again available in both single (SPST designation) and double pole configurations.
Programmable Baseboard Heater Thermostats
Programmable thermostats are the ultimate in comfort and energy savings. Electric heat is not noted for much in the way of energy savings and these thermostats will help with their ability to automatically raise and lower the temperature by the time of day and day of the week. Although more costly they can pay for themselves in less than a winter in cost savings.
Programmable thermostats are available in several programming styles. A 5-2 listing indicates that one setting is for the weekdays while the other is reserved for Saturday and Sunday. Occasionally this setting will allow the 5 weekdays to be individually programmed. Make sure that at least 4 settings are available in each weekday. A common setting might be 70 degrees from 5AM to 7 AM (wake up and have breakfast), 65 degrees from 7AM to 4PM (gone to work), 70 degrees from 4PM to 10PM (evening at home) and 65 degrees from 10PM to 5AM (sleep). Four different settings, all adjustable for time of day as well as temperature. This type of programming could result in a higher temperature setting only 8 hours of the day; the rest of each day the temperature is reduced (by 5º in the example) which results in energy savings.
A 7 day programmable thermostat typically has different settings for each day, ideal for people with different work schedules than the more common weekday/weekend schedule.
Read More From Dengarden
Some of these high quality thermostats can operate either a single or double pole system, making a buying decision that much easier.
Do Energy Savings Matter To You?
10 Best Baseboard Thermostats
Installing the New Thermostat
- As always with any electrical work, TURN OFF THE POWER . You will most likely be working on circuits that carry 240 volts; a shock from this voltage can be deadly and even a simple shorted wire near fingers will produce a very nasty burn. TURN OFF THE POWER!
- Remove the old unit. Most are connected via wire nuts to wires coming from inside the new thermostat, but some can have screw terminals to attach wires to. If possible, make note which wires are "line" and which are "load". A single pole thermostat will have 2 wires going to it while a double pole thermostat will have four wires. Make sure the new thermostat is compatible.
- With the old thermostat removed from the wall box but not disconnected check that the power is indeed turned off; one of the most valuable (and inexpensive) tools to use here is a non-contact voltage detector. These tools will find voltage even through insulation so there is no need to strip the wire; just touch the tool to the wire. If you were able to determine which wires are the "line" side wires, mark them with tape or other method.
- If you were not able to determine which are the "line" side wires, it must be determined by testing for voltage. With the thermostat turned off and removed from the wall but still connected to the wires carefully separate each wire as far as possible from each other wire and turn the power back on. Make absolutely sure that neither children nor anyone else can reach these exposed wires! Use an assistant if necessary, just to keep curious fingers away. Again using the voltage detector, carefully touch each wire with the tool; if there are only 2 wires one will indicate voltage while if there are four wires (double pole) then two of them will indicate voltage. If the thermostat is turned on at this point all wires may indicate voltage; if this happens either turn the thermostat off or to a very low setting and retest.
- In the unlikely event that the thermostat is broken and stuck in the on position, TURN THE POWER BACK OFF , remove the wires from the thermostat and securely cap the exposed end of each wire with a wire nut. Turn the power back on and repeat the test, mark the powered wires and TURN THE POWER OFF . Use the detector to verify it is off. Never forget that you are dealing with 240 volts - do not take any risk of shock.
- The wires you have marked as powered are the "line" side of the thermostat and go the fuse panel; the other one (or two if a double pole thermostat) are the "load" side and go to the heater. With the wires identified connect them to the thermostat according to the directions from the manufacturer. A common color designation for wires factory attached to the thermostat is black for "line" side and red for "load" side, but manufacturers do vary from that, so check their directions. It won't matter which wire goes where, except that the "line" side wires go to the "line" or perhaps "power" side of the thermostat and the "load" side wires go to the "load" or perhaps "heater" side of the thermostat. Many thermostats use wires that must be connected to the existing wires with wire nuts; twist the nuts on firmly and then give each one a firm tug to see if it will come back out of the wire nut. Once all terminations are made, fold the wires back into the wall box and attach the new thermostat to the box. Use a level, if one is available, to make sure the thermostat is level and plumb - if not the screw holes in the new thermostat will be slotted so that it can be tipped slightly one way or the other. Turn the power back on and set the temperature to the desired level or program (if applicable) your new thermostat.
- Congratulations! You have installed a new thermostat to replace the old one, and it wasn't that difficult, was it? If you only remember to TURN OFF THE POWER you will have no trouble with this simple installation. Don't be afraid to try something new; the next thing you know you will be replacing your own lighting fixtures, with perhaps a new light switch and electrical outlets. None of these are beyond the average homeowner; why should they be beyond you?
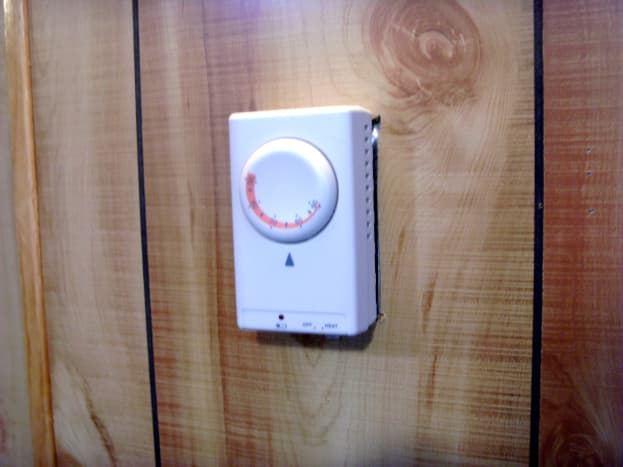
Old thermostat to be removed.
This article is accurate and true to the best of the author's knowledge. Content is for informational or entertainment purposes only and does not substitute for personal counsel or professional advice in business, financial, legal, or technical matters.
Questions & Answers
Question: So is it possible to replace the internal thermostat with a wall thermostat? I have a king LPW 240v heater and I have purchased a single-pole line thermostat to convert it. Can the existing wires to the internal thermostat be run to the wall thermostat? I have already ran the wires and installed the box in the wall. I ran 10-3 wire so I will have L1 and L2 at the thermostat.
Answer: Probably the best way to do this is to simply remove the internal thermostat from the circuit. Send the incoming power wires to the new thermostat and then hook them directly to the heating elements when they return to the heater, removing any wires going to the internal stat.
If you want both stats operating, though, you can do so. Just make sure that the new 10-3 wire is connected to the incoming power before the internal stat, and then terminal the wires returning from the new stat to the internal one.
Question: I am replacing a wall mounted baseboard thermostat, double pole. The existing thermostat has a copper wire attached to a bolt on the back of the thermostat, the new one does not have this bolt. What do I do with the copper wire?
Answer: You didn't say, but it sounds like that wire is a ground. If it has no insulation or green insulation that would be the case and it can be simply tucked back into the box and ignored.
If it has any other color of insulation, however, it is a "hot" wire and will need to be used with the new thermostat.
Question: I am replacing a thermostat for baseboard heaters in parallel in the living room. The thermostat box only has 1 set of wires coming into it (1 white 1 black). Everything I'm reading says there should be 2 SETS of wires (2 black, 2 white) coming in. I'm confused about how this setup is wired. Is it safe? The smart thermostat I was looking at (Mysa) says you can't hookup if only 1 set of wires in the box.
Answer: It is possible, particularly with an older installation, that the power went to the baseboard and then to a purely mechanical thermostat. If so, it is quite possible that only one cable, with a single black and single white wire was used; one to supply power to the thermostat and one to return a switched line back to the heater.
If this is the case it is unlikely that a smart thermostat will work - all are electronic and all will require either 120 or 240 volts available just to operate the electronics in the stat. You will have neither 120 nor 240 available at the stat if it was originally wired this way.
Question: I'm replacing a 4 wire analog thermostat with a digital 2 wire thermostats. The new unit is comparable but my question is what wires should I connect to the two black wires on the unit. Should I put the red wires together and cap them and then connect the black wires to the unit?
Answer: That will be fine. You can either hook both reds or both blacks to the thermostat wires. A word of caution though - if you ever work on the heater, turning the thermostat off will NOT remove all power from the heater. Those two red wires, spliced together at the thermostat, will always be hot.
Question: I am replacing a 35 year old thermostat with a new one. On the old one, the terminals are named L1 L2 L3 L 4. They are divided into two parts. Line and Load. The new thermostat has the designations L1 L2 T1 and T2. How do they correspond?
Answer: Line (incoming power) are almost certainly the L1 and L2, but in any case, the ones designated as "Line". The load (going to your heater) will be L3 and L4 (or the ones designated as "load"), and T1 and T2 on the new thermostat.
Question: I'm trying to install a double pole thermostat to a baseboard heater. Three cables enter the box, one from the main panel, one to the wall heater, and one unknown. I have nine total wires including the ground wire in each cable. The two leads from the panel go to L1 and L2. I would say two leads from the heater attach to Load 1 (T-1) and Load 2 (T-2). Where do the leads from the other cable go?
Answer: If you don't know where the other end of that one cable goes, there is no way to know where it should be terminated. If it goes to another heater, it will terminate on T-1 and T-2. If it feeds another thermostat, it will go to L1 and L2. If it is an abandoned wire, it doesn't terminate at all.
Question: I have two circuit breakers for my baseboard heaters, some of the heaters turned on and two did not. Is it a circuit breaker problem?
Answer: Turn the breakers fully off and then back on - if they have tripped it may not be obvious and turning them off and back on will reset them.
Check that the heaters are not turned off at the heater and that any thermostat is working.
If these do not produce heat, you can check for power at the heater. If there is none, there is either a problem with the breakers, thermostat or possibly any on/off switch at the heater. If there is power at the heater but no heat, then the heater is defective.
© 2010 Dan Harmon
Dan Harmon (author) from Boise, Idaho on January 18, 2013:
You're getting it. One pair of wires powers both the stat and, after passing through the stat, the heater. The other pair powers the heater alone.
Unfortunately, after seeing your description, you don't seem to have two "sets" of wires coming through the wall, merely one wire to feed the stat and one to feed the heater. All devices, whether it be a light, a heater, or a plug in vacuum cleaner requires at least two wires. In the case of a 110 volt device one wire is "hot" and the other is a "neutral". In the case of a 220 volt device both are "hot" wires, but they are NOT the same "hot"; they come from different sources in your breaker panel.
It very much sounds like you have one "hot" coming into your stat from the heater, and that wire will be "hot" all the time. Most likely the one labeled "L". The one labeled "T" is a "switch leg"; it is either "hot" or not depending on whether the thermostat has switched it on or off.
There is no second "hot" and there is no neutral. Just two wires that the thermostat will either connect together or disconnect to turn the heater on and off. Without a second "hot" there is no power to run the stat. Doing as you suggest, running a pigtail from L to L2 is the exact same thing as connecting L, L1 and L2 all together with one wire nut; you only have one wire (L) to do the job of two.
From your description, then, you can either run your thermostat on battery alone (assuming it has a backup battery, and most do), or you can purchase a mechanical thermostat that does not require power to run any electronics. Using the battery is unlikely to be a satisfactory solution as it will likely need replaced every week or two. The only other option is to pull more wire between the heater and the thermostat.
Sorry to be the bearer of bad tidings, but that is what I'm seeing from your description.
Chris on January 17, 2013:
Ok, I think I'm starting to understand. I have an electronic thermostat, and it sounds like one set of wires powers the heater, and the other set powers the thermostat? Basically I have two wires coming out of the wall (labeled L and T) and 4 wires coming out of the thermostat (labeled L1,L2,T1,T2). So I think I need to hook up L to L1 and T to T1, and then run a pigtale from L to L2? Thanks for the quick reply btw, I really appreciate it.
Dan Harmon (author) from Boise, Idaho on January 15, 2013:
If the thermostat is of the mechanical variety (it does not need voltage to operate any electronics in it) then simply connect one of the two wires to through the thermostat while the other one passes straight through without ever touching the thermostat.
If the thermostat is electronic it will need both wires to power the thermostat. The second wire, however, does not need to be switched through it. Cut the second wire, then, and splice a short "pigtail" - a 6" piece of wire in with a wire nut. The two "second" wires (incoming and outgoing) will now have an extra short wire attached to them; terminate that wire on the "line" side of the thermostat. The "load" side of the second pole will not have anything attached.
If you are unfortunate enough to have a system where the power goes to the heater first, then a 2 wire cable to the thermostat (one "line" and one "load") you will have to either have a purely mechanical stat or depend on a battery to keep it operating. Or, of course, pull a new 3 wire cable through the wall.
If this doesn't answer your question - if I've misunderstood your problem - let me know and I'll try again.
Chris on January 15, 2013:
Hi Wilderness, well done. This is the best article on line voltage thermostats I've seen in hours of searching the web. I'm wondering if you can go into more detail on installing a 2 pole thermostat on a single pole system. Info on such a project is very hard to find, and of course, that's what I'm working with. Thanks in advance!
Dan Harmon (author) from Boise, Idaho on October 04, 2011:
If your breaker panel is sparking you have problems that urgently need fixed. Fire is a high possibility and sparking will damage the panel as well.
Most home breakers simply pull straight out at the center of the box and then slide out from under a clip on the outside. Some have a screw in the center that holds that side of the breaker in. You must, of course, turn the main power off, but be aware that parts of the panel will still be hot! Remove the wire from the outside of the breaker, snap it out and take it to the store for an exact replacement - breakers are not interchangeable between manufacturers. Never, ever change the ampacity of a breaker - a 15 amp breaker MUST be replaced with a 15 amp.
WD Curry 111 from Space Coast on October 04, 2011:
Great job! Well written. It won't do me much good around here, but I enjoyed the lesson. My circuit box is all messed up . . . mislabel and sparking sometimes. How do you change out the breakers? Sorry if you already have one about it and I didn't notice.
How To Install Baseboard Heater Thermostat
Source: https://dengarden.com/home-improvement/buy-and-install-your-own-line-voltage-baseboard-heater-thermostat
Posted by: martinezbither.blogspot.com
0 Response to "How To Install Baseboard Heater Thermostat"
Post a Comment